If you’re anything like me, when you get done with a big sewing project your table looks a bit like this:

Threads and scraps everywhere!
I used to try to clean these up by wiping with my hand or with a piece of fabric, but that only knocked thread to the floor.
But alas, there’s an easier way!

That’s right. A lint roller.
If you haven’t thought of this already you’re probably hitting yourself like I was for not thinking of it sooner. Usually I only think to reach for the lint roller when I’m wearing black, but it’s a great cleanup tool.

Look at all that. It’s almost gross.

Now it’s clean and pristine!
Connect with me:


![]()

I’m not ashamed to say I use reusable grocery bags every time I go to the grocery store (unless I forget to bring them with me). Yesterday I went to an event where they handed out fabric bags to throw your goodies in, and my first thought was “Yay another grocery bag!” My family also holds onto gift bags and reuses the same ones over and over and over again. So I thought to myself, why not sew a fabric gift bag?
A little drawstring Christmas pouch is great for small gifts, candy, ornaments, etc. It’s reusable, and the drawstring opening builds suspense by completely concealing what’s inside. And if your Christmas party is lacking anything, it’s suspense.
What you’ll need:
- A Christmas fabric
- Matching thread
- Ribbon
- A safety pin

First I take a cut of fabric that’s about twice as long as it is wide.

I press them in half where the bottom of the bag will be, and the two free ends that meet at the top will form the opening.

My ribbon is 3/8″ wide, so I’m making the drawstring casing 1/2″ wide to allow adequate room. to make sure no frayed edges are exposed, Fold over about 1/8″ on the edge of the fabric and stitch it in place. Only one side is pictured above, but I do this on both sides of the opening.

Next I fold down 1/2″ and press to form the casing.


I stitch down the casing with a zigzag stitch to keep the edge from fraying as much. I could theoretically overlock and then straight stitch it down, but the zigzag stitch just looks more fun. And in the words of Sheldon Cooper, “What’s life without whimsy?”


Next I pin the right sides together to form the sides of the bag, and these I stitch with an overlock stitch and no seam allowance so that the stitch will line up perfectly when the edge of the casing. Make sure to leave the opening of the casing free so you can insert the ribbon!

To make the bag stand up on its own, you’ll want to sew the corners of the inside into two triangles that will lay flat against the bottom. I don’t know if there’s a science to determining how wide you want your triangles, but I make mine half the width of my pouch. My pouch is 6 inches wide, so you can see in the picture that I’m making my triangles 3 inches wide, with the side seam right in the middle. I draw a line where my gauge is measuring 3 inches and stitch right along that line, then draw a similar line on the other side and repeat.

A view from the top after I stitched my corners.
Next it’s time to insert the ribbon and make it a drawstring pouch!

I used leftover pieces of ribbon from another project that weren’t quite long enough, but you’ll want yours to be twice the width of your bag plus a couple of inches. My pouches were 6 inches wide, so I should have used 14 inch ribbons, but alas.


Affix a safety pin to the end of one of your ribbons, and insert it into one of the casings. When you reach the next opening, keep pushing the ribbon through the other side of the casing until the ribbon has come full circle.

Now you’re halfway done!

Finally, attach the safety pin to one end of your second piece of ribbon, and insert it into the other side of the opening, where your first ribbon simply continued through without stopping. You’ll again want to move the ribbon all the way through so that both ends of the same ribbon are on the same side of the opening.
And voila! You have a drawstring little pouch for Christmas. I think these would be great if you’re having a party and want to give out little goody bags, and you can make it taller or wider as you so desire!
Connect with me:
![]()
 Wall shelves can be a sleek, minimalist way to create some storage space in your home. I decided to install some wall shelves above my TV to clear up some of the clutter on my TV stand.
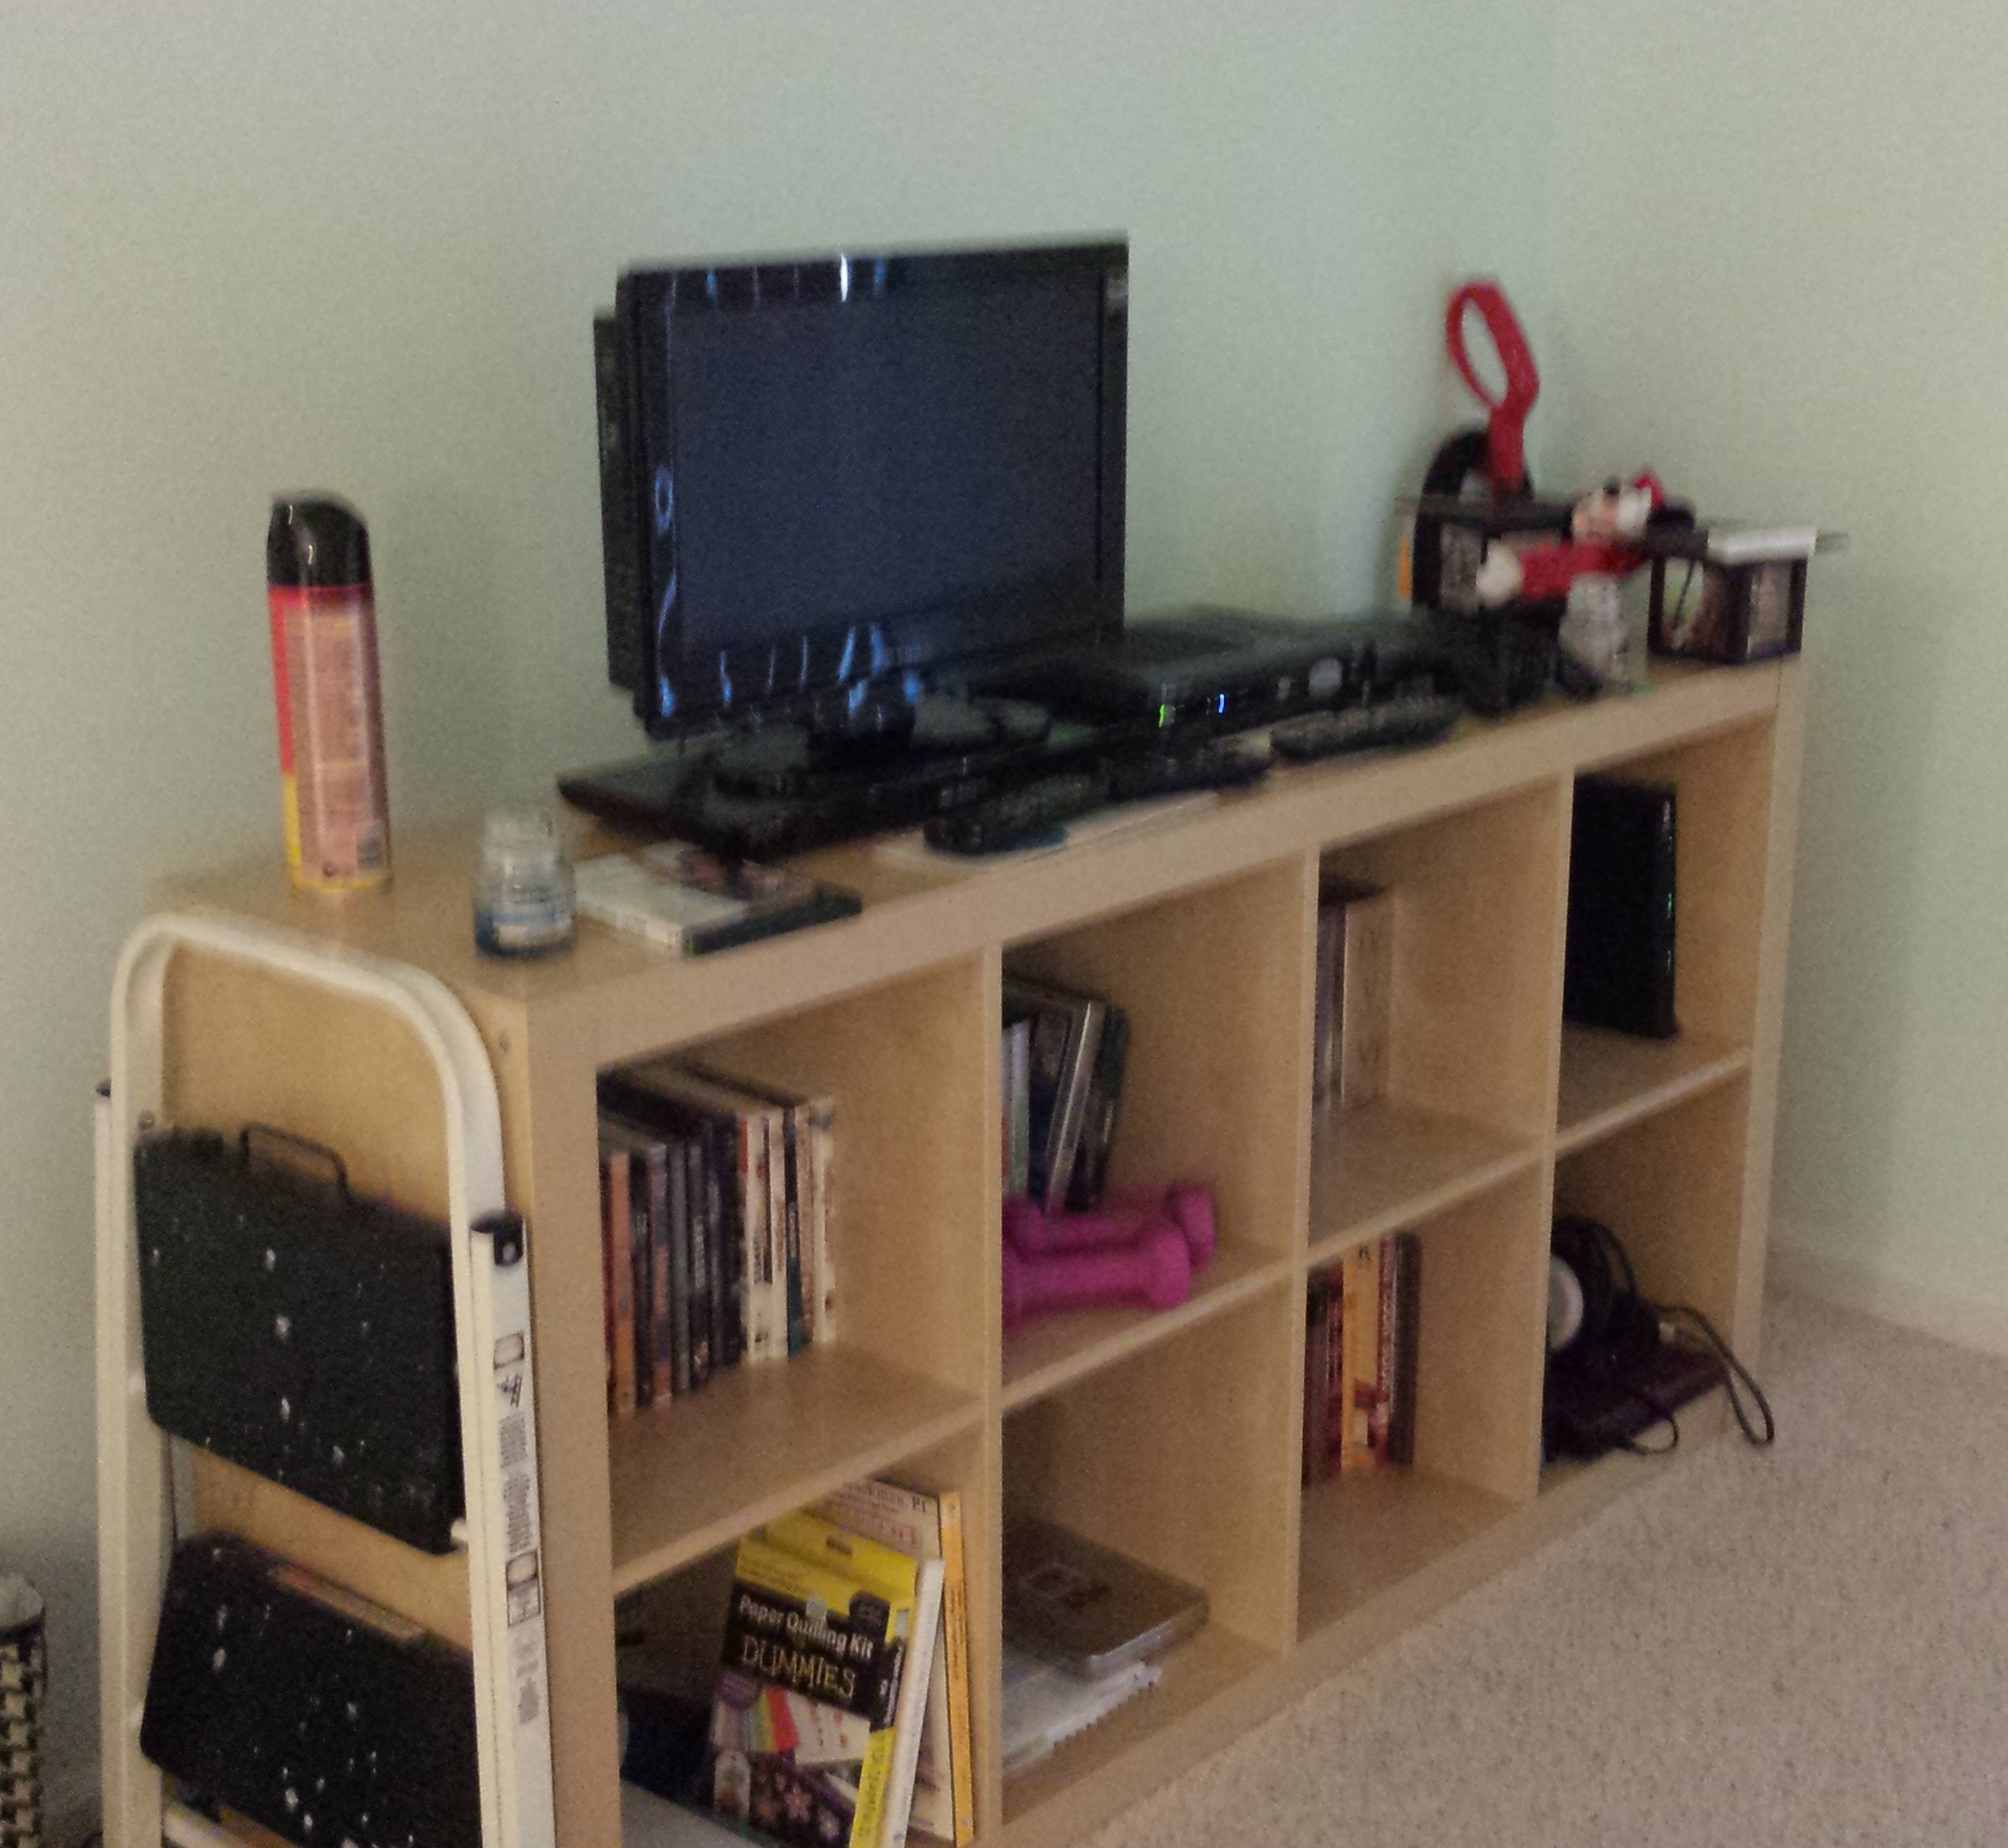 Before, I had junk all over the stand blocking my remote signals and stressing me out. Also I had a gaping empty stretch of wall that needed filling!
Remember the post where I talked about how to find a stud in your wall? Well this is why I had to learn how! Each shelf has three screws to secure it to the wall, and for maximum weight capacity at least one has to be secured to a stud.
Here are a few screwing tips I learned to hang these walls.
 Before you get to screwing, you’ll want to use a skinny drill bit like the one pictured above to form a little starter hole where you’re planning to drill in a screw. It’ll make the screw move into the wall more easily.
 The white screw-looking object pictured above is actually a dry wall anchor. Anchors will help stabilize a screw in the wall so that it can carry more weight without pulling out a chunk of the wall. I only used anchors on screws that weren’t going into a stud. Different kinds of anchors come with different instructions, so be sure to follow yours closely!
 If your screw ends up looking like the one pictured above, and no screwdriver can turn it in or out, you have yourself a stripped screw. The only choice is to take it out and put in a new one. Mine got so securely stuck I had to get out the pliers and jiggle it out!
 Eventually all my screwing hung the bracket above that in theory I’d be able to gently slide the shelf onto, but really sliding the self onto the bracket may have been the most difficult step!
 But eventually I was able to do it! And now I have some nifty storage space and some screwing experience under my belt.
I prayed pretty vehemently that hanging these right above my TV wouldn’t backfire terribly, but so far they’ve been safe and secure!
Connect with me:
![]()

I took up painting as a hobby in college, because I kept thinking of paintings I’d really like to buy but didn’t exist yet. So I realized the solution to this was to paint them myself. However, I don’t quite have the dedication to the craft to make hyperrealistic paintings (besides, that’s what cameras are for), so instead I focus on abstract designs.
This painting project is extremely easy, and you can use any combination of colors that you want. So if you have a spot of empty wall you’d like to fill with something but don’t entirely know what, this is a great flexible project you can try!
 Your materials (pictured above) include a canvas or other painting surface, painter’s tape, a sponge, your chosen paint colors, and a palette or similar surface to hold multiple colors of paint.
The first step is to lay down your tape vertically to form columns, and then diagonally across the columns to form the chevron pattern. Your dimensions will vary based on the size of your canvas and your personal preference, and they don’t even have to be equal in size, but for my project I made the columns 2 1/2″ wide and the rows 1 5/8″ tall. Or maybe it was 1 3/8″. Oh well, not the important part.
The important part is that you remember to factor in the width of your painter’s tape when deciding on your dimensions!
 In this picture you can see my evenly spaced columns. Notice that on the edges, I made sure to completely cover the edge of the canvas in tape. I do this to hold down the canvas so that when I do my sponging it stays in place even as I’m rapidly dabbing.
You can also see that the columns end a little further from the edge on the right than they do on the left. This is due to the canvas company lying to me about the dimensions of this canvas paper, and I feel horribly betrayed and will never forgive them for that. But we’ll move on.
 Now for this step, you’ll probably want to click the above picture to enlarge so you can really see what I’m saying.
Notice on each side of the column there’s a small pencil mark, and the diagonal piece of tape lines up with these marks.
The two marks are 1/2″ apart, but on opposite sides of the column. You can choose whatever width you want to create a deeper or more shallow angle, but I went with 1/2″ because it’s easy to remember. Make these marks wherever a diagonal line will go, remembering to alternate the direction in each column to create a zigzag line.
But one important thing to remember is to be consistent with which side of the tape you make your marks. As you can see in that picture, I laid the tape so the top edge lined up with the marks and then made sure that every time I laid down the tape I was lining up the top edge with the marks.
It can be a little confusing at first, but once you get into the pattern it’s easy. Also, if you make a mistake, painter’s tape is easy to remove and replace!
 Make sure you lay down extra tape to cover up the edges where you don’t want paint to appear!
 As you’re laying down your diagonals, be sure that the end of the tape doesn’t go over your column tape. The diagonal lines should just meet in the middle.
 Once you’ve laid down all your tape, rejoice! The hardest part is officially over. Now it’s time to sponge.
 Sponging is extremely easy. To start, squirt some paint into a section of your palette. I usually choose a base color to cover most or all of the canvas, then use the other colors as accent colors. For this I decided to use a blue and a purple as base colors, and started with the blue.
Dip your sponge into the paint. You can see from the middle picture that I got a hearty glob on the sponge. Globs take longer to dry and make it hard to layer other colors, so I dabbed on the newspaper a few times to get excess paint off the sponge.
 All you have to do is press the sponge onto the canvas to make your first mark, then repeat over and over to cover an area. It’s quite easy!
You can cover the entire surface evenly with your base color, but I choose to vary the coverage across the canvas, making the color thinner in some areas and heavier in others.
 Next I simply repeated the sponging process with my purple of choice to create a solid base on which to lay my accents down.
Now it’s time for the accents!
 In general with acrylic paint you’ll want to layer lighter colors on top of darker colors, and do several layers because the paint will thin as it dries so lighter colors will fade into the background a little. As you can see I used varying shades of blue, pink, and purple. There doesn’t have to be any pattern or forethought, just dip & dab away until the area is covered and you’re happy with your colors.
Now just let your paint dry and then remove all of the painter’s tape.
 You may have some stray marks where the paint leaked through or under the tape. You can leave them and ignore them, but you can also easily cover them with some carefully applied white paint.
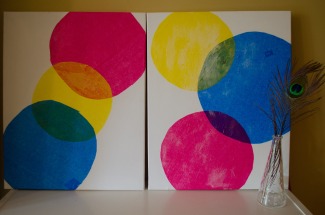
And voila, you now have a funky painting that’s exactly the colors you like and will be completely unique to your home, and it only took about an hour!
Connect with me:
![]()
 If you’re unfamiliar with the way homes are built, you might not know that your walls are actually mostly hollow, with vertical wooden structures called studs (pictured above) built in for support.
A lot of home decor objects that are made to hang on the wall, like the wall shelves I recently bought, need to be secured to a stud to prevent falling and pulling out a piece of the wall. So if you’re planning to hang an object, you’ll need to know how to find the studs in your wall.
Just a note, when you tell people you’re having trouble finding studs it’s a good idea to clarify that you mean in your walls. It should come as no surprise that I got a lot of funny looks when I said I needed help finding a stud to hang my wall shelves.
But hopefully this post will keep you from getting put in such awkward situations.
A good starting place for finding studs is an outlet.
 Outlets are typically attached to the side of a stud, so you can be pretty sure that there will be one either to the left or right of any outlet in your home. The trick is to determine which side it’s on.
One basic technique is the “knock and listen” technique, which consists of knocking on the wall and listening for the stud’s location. As I mentioned before, walls are hollow except for where a stud is, so most spots you knock will produce a hollow sound. When you hear a fuller sound, you’ve likely found a stud.
However, when I tried this method in my apartment walls I had little luck. So here’s another method I found to determine with more accuracy where your studs are located.
Start by grabbing the strongest magnet on your refrigerator.
 Zigzag the magnet above the outlet, covering the areas to the left and right of the outlet. What you’re doing is looking for a nail where the wall was attached to the stud. Keep moving left and right and up and down until you feel your magnet pull.
 This picture is slightly blurry as I was taking it left handed, but you can see that the tip of the magnet is pulled against the wall. Grab a pencil and draw and “X” because you’ve found a stud!
Studs are typically 16 inches apart in modern homes, but they may be 24 inches apart. From your X, measure 16 inches to either side and find the next stud using either the knock and listen technique or your magnet. If you can’t find the next stud at 16 inches, try 24 inches instead.
Now you’re ready to have your decorations and be sure that they’re secure on your wall!
Connect with me:
![]()
Hello crafters!
I put most of my crafting focus on sewing, but I’m no one trick pony. If you follow me on Pinterest you’ll notice I pin a lot of non-sewing crafts and sometimes just images that inspire me. Here are some of the craft ideas I’ve picked up from around the web that I’d like to attempt and wanted to share with you.
- This craft comes from a blog called Ocean City Gal. It looks like an easy way to add a little pop to your walls, so I’ll definitely be trying it soon!

- This is a cute idea from U Create: Fabric baskets for storing anything cutely! I imagine this could easily be adapted into a cubic shelf drawer as well.
- This video comes from Colourlicious, and I really like it because I’ve actually been looking for a way to create coasters for myself. Right now I’m using a folded paper towel as a coaster!
Look out for more crafts from around the web soon!
Connect with me:
![]()

Even the most eclectic collection of furniture and decor can seem unified if you establish a color palette for the room and work within that scheme.
As I mentioned in this post, when I set out to cute-ify my kitchen, one of the first steps was to decide what color scheme I wanted to use. Before I even moved into my apartment, I knew I wanted it to have a beachy and open vibe, so blue-greens were a natural choice. I painted the walls a deep sea foam and bought linens in shades of turquoise. I decided my accent colors would be a warm brown, like my paper towel holder, and green as in my kitchen rug.
That example had a pretty narrow spectrum of colors I wanted to use, but not every color in your scheme has to be next to each other on the color wheel. Here are a few tips on thinking outside the box to create a color scheme for your room.
- Start with paint chips. Head to your local hardware store and collect paint chips in a wide variety of hues and values that will allow you to mix, match, and experiment freely. Pick up paint chips that have multiple values of a pigment on one sheet, and cut the chips to separate the values and allow you more flexibility. Then arrange and rearrange them freely until you stumble upon a color combination you particularly like – working without setting yourself boundaries could bring out ideas you would never have considered otherwise!
- If it’s not an empty room, start with the objects you can’t change. Somewhat luckily for me, my apartment was completely empty when I moved in. But if you’re on a redecorating kick, start thinking about colors relative to the piece(s) of furniture that have to stay. Painting a room and buying accent pieces are much easier and less expensive than a new couch or bed.
- If you get stuck, try complimentary colors. As I said before, not every color in your scheme needs to be next to each other on the color wheel. If you want to add a little pop to a room, try jumping across the color wheel and using a complimentary color. For example, a well-placed orange accent will work great against a rich cerulean.
- Browse the fabric store and sew your own decorative items. My last post was about choosing a fabric for home decor based on texture and other factors, and deciding to DIY your home decor even simply for accent pieces will allow you more options while working within your color scheme. It’s also much less expensive than buying everything from a boutique.
- Look for inspiration wherever you find it. Don’t just browse others’ home decor for color inspiration. Color is everywhere! A picture of a parrot could be the jumping off point for a vibrantly colored room, or the local park might give you ideas for earthy, natural tones. If it inspires you, it’s not wrong!
Try these techniques and see if they don’t get the color juices flowing!
Connect with me:
![]()

So you’re basically a beginner at sewing your own stuff, but you’ve found an awesome home decor sewing project that you can’t wait to try (might I recommend this one or this one?). You head down to the fabric store ready to buy a yard or two of the cutest fabric you can find, but the options are a bit overwhelming. How can there even be so many forms of cotton? How do you know which is the right fabric for your project?
Hopefully this post will be able to help you navigate those waters a bit.
I myself typically gravitate towards woven fabric as opposed to knit fabric. Woven fabric is easier to sew because it doesn’t have as much of a stretch as knit. I’m also biased towards cotton for no particular reason.
But when you’re choosing a fabric for your next project, here are some factors to consider:
- What are you using the fabric for? Is it an object that will be heavily used, like a seat cushion, or purely decorative like a throw pillow? You could probably guess that heavier-duty fabrics need to be used for objects that will see more wear and tear, but more delicate fabrics can be used for projects that won’t be touched often.
- Will you need to clean it often? Consider the cleaning instructions, typically written on the fabric bolt. An object like a tablecloth or placemat that will be exposed to the risk of spills and stains should be easy to clean, so you should avoid dry clean only fabrics for these projects.
- Does it match what you already have? This is important not only in terms of color, but also in terms of texture. If your style of choice for the room in question is soft and light, a heavy duty fabric will look out of place. Likewise, a piece of home decor made from lightweight quilting cotton may look cheap amidst leather furniture and rich mahogany.
- Is it easy to work with? I mentioned this earlier, but I typically choose woven fabrics as they’re less prone to stretching and distorting during sewing. You’ll also want to choose a fabric that’s of a thickness that you’re comfortable with and have the materials to sew.
If you keep these things in mind as you shop, it should be much easier to choose the fabric that will best fit your project.
Thanks for reading!
Connect with me:
![]()

When I moved into my empty apartment in May, I was initially using a flipped-over laundry basket as a dining table. When I was able to go to Ikea and upgrade to a real table, I was pretty excited. I then got a bowl to fill with fruit to grab on my way out the door to work and to serve as decoration. But sometimes that bowl looks lonely.
 Like this.
So I decided to put something under that bowl that might jazz up the space a little bit. I clear the table for sewing occasionally, so a full-length table runner or table cloth would get annoying. So instead I decided to sew a small centerpiece. It’s a very easy project to do, so follow along for a guide on how to make one of your own!
What you’ll need for this super easy sewing project:
- Fabric of your choice. You can use a decorative fabric on top then a basic fabric on the bottom, match top to bottom, two different decorative fabrics, whatever you want to do!
- Drafting paper
- Pencil
- Ruler
- And all your basic sewing supplies
 Using drafting paper, a pencil, and my ruler, I drew two perpendicular lines that split each other right down the middle. These were my desired length and width, plus seam allowances. So if you want one that’s 22″ long and 16″ wide, with a 1/2″ seam allowance, your lines would be 23″ and 17″.
 Next I sketched a curved line to connect two ends. I chose one curve and erased the rest. It’d be near impossible to replicate this curve by hand three times and have a fully symmetrical centerpiece, so let’s do it an easier way.
 Fold your paper along one line, so that your drawn curve is on the bottom layer of paper. You’ll be able to see the curve through the op layer, so trace it onto the top layer and unfold. Repeat by folding along the other line, so you have one full symmetrical shape.
 Cut out your shape and press out the creases, just as you would with a store-bought sewing pattern.
 Trace the pattern onto two pieces of fabric. I chose to use a decorative home decor fabric for the top but use plain quilting cotton for the bottom. But this part is totally up to you!
 Pin right sides together, but before you stitch if you’re using a curved shape like mine, it’s a good idea to mark your stitching line before you take it to the machine. Seam allowances can be pretty difficult to stick to on a curved seam, so even though this may feel tedious it will help you keep your place. For more tips on sewing on a curve, check out this helpful resource from Sew4Home.
 You’ll want to leave a few inches unstitched so that you can flip it inside out. Be sure to make a mark to remind yourself to stop stitching!
 Now all you have left to do is flip it right side out, press your seam, and slip stitch the opening shut.
 Now my fruit bowl isn’t quite so lonely.
This is a really easy project to do in an hour or so, and you can make several different centerpieces for different times of the year or events. Hope you enjoy!
Connect with me:
![]()

I moved into my apartment mid-May after graduating from college with zero furniture.
My apartment was a beige wasteland.
Thanks to a paint job and some Ikea furniture, it’s not quite as bad as it was, but it’s still a little boring. So I decided to look into some easy decorative pieces that I could sew to jazz it up.
A clear frontrunner emerged: the throw pillow.
Now, to be honest I still don’t have a couch to keep a throw pillow on. But I wanted to try it anyway.
If you can sew in a straight line and press a hem you have want it takes to make a throw pillowcase!
Here’s a quick rundown of how I make a 16×16 open back pillowcase:


Assuming a 1/2″ seam allowance, draw a 17″x17″ square on your fabric of choice. This will be the front of the pillowcase.
The back is a little trickier.

The back will be two pieces that overlap. Divide 17 by two and you’ll get 8.5″. But you’ll also want some extra length to press under, and a little extra so that the two pieces will touch.
I decided to press under 1/2″ twice, so I added an inch, then an extra 1/4″ for overlap. So the width of my two back pieces were 9 3/4″ (Full disclosure: Harry Potter was on) and the length was 17″.
Make sure as you draw these pieces that the pattern will line up when you make your stitches.
 Here are all my pieces laid out. Note that the design on the fabric is the same on every one.
 Next I laid the pieces right sides together as they’re going to be stitched. The two overlapping edges should be pressed and stitched before you sew the side seams though.
 It’s a good idea to lightly mark the edges you’re going to press so that you don’t get them mixed up as you move them to your ironing board.
 You can choose how wide or narrow to press the edges, but I chose to press them 1/2″ twice, so that the raw edge is enclosed.
 Topstitch the pressed edges in place.
 Now just pin right sides together and sew around the edges on each of the 4 sides, leaving the center of the back open.
When trimming your seams, I’ve been told that trimming the corners in a curve and trimming closer to the seam on one piece of fabric than the other will help your corners be less bulky. Personally since this is a removable pillowcase I chose to trim the seam allowances to about 1/4″ and finish with an overlock stitch.
Whatever you choose to do, next you just have to flip it right side out and press the seams – I recommend using a pressing ham to press them open and then flat.
 And voila! You have a throw pillowcase! Buy a 16×16 pillowform from a craft store like JoAnn’s and you’re all set!
This is an extremely easy project for a beginner. But if you like the pillow I just made and want one exactly like it, you can purchase it from my Etsy shop here (I don’t have a couch to put it on so I don’t mind parting with it!)
Also be sure to follow me on Twitter!
Happy sewing!
Connect with me:
![]()


